

Getting started
Set up your shop
Signup takes three short steps. After that, a handful of settings decide what your estimates and invoices say and what an hour of your time costs the customer.
The signup wizard
The wizard has three steps: Organization, Team, and Done.
- Organization: your shop name, address, and timezone. The name and timezone are required. The timezone starts on your computer’s clock, so check it if you are signing up from somewhere else.
- Team: confirm how you appear and invite the people who will work jobs. Skip for now works here, and you can invite people later from Staff.
- Done: a summary of what was created, with three next steps: Add a customer aircraft, Invite a technician, and Set your labor rates.
Resyrv MRO does not ask what kind of shop you are. A Part 145 repair station and a one-person A&P shop get the same app.
Shop details
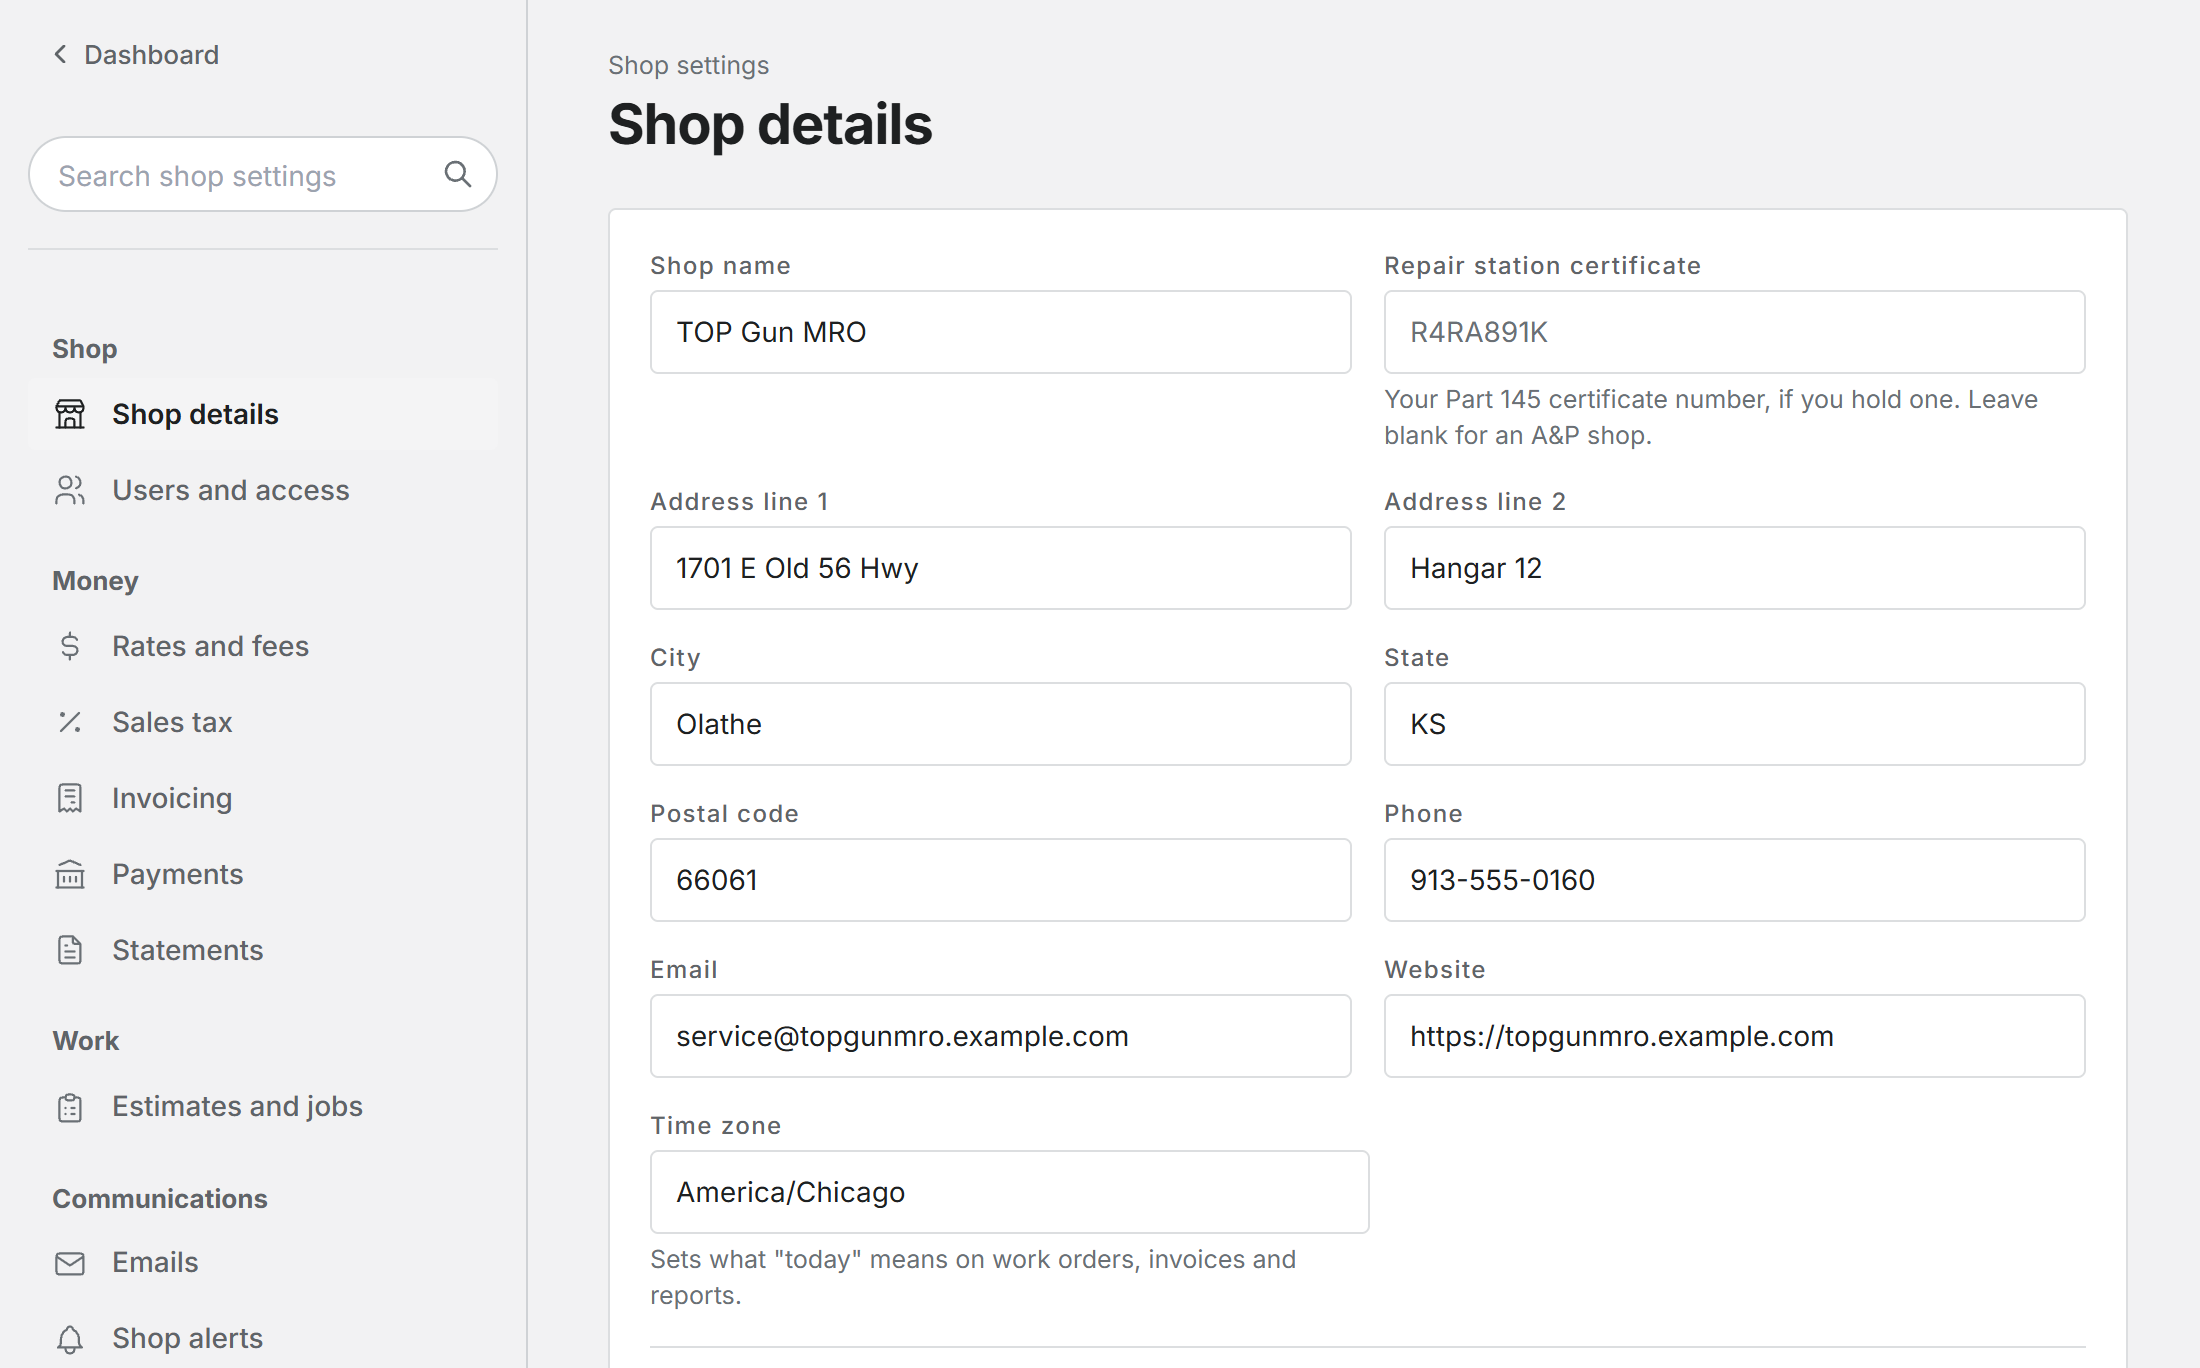
Open Shop settings from the sidebar, then Shop details. Everything here prints on your estimates and invoices: shop name, address, phone, email, website, and your logo.
Repair station certificate is for your Part 145 certificate number. Leave it blank if you are an A&P shop without one.
Rates, tax, and invoices
Rates and fees sets your labor rates, parts markup, time rules, price book, and fees. Until the shop has a default labor rate, clocked time carries no rate unless the technician has their own.
Sales tax decides how labor, parts, and other charges are taxed on estimates and invoices.
Invoicing covers invoice numbering, payment terms, and what prints on each invoice.
Invite your staff and pick roles
Add a customer and their aircraft
Was this page helpful?
Can’t find what you need? Contact us - a real person reads every message.