

How-to Guides
Book, Dispatch, and Return a Flight
This guide walks one rental flight through its whole life: booked on the schedule, signed, dispatched, flown, returned, and billed, with a screenshot at every step. It follows a member self-serving; a front desk runs the identical flow on the member’s behalf.
Before you start
- You need a member account that can book on the schedule. Booking with someone else as the pilot in command takes the "Book for other members" permission. Front desk staff and instructors hold it by default.
- If your organization requires a pilot signature at dispatch, set your signature PIN first under Profile, then Signature PIN. Signing takes five seconds once the PIN exists.
- The dispatch workflow is a per-organization setting. If you see no Dispatch button on reservations, your organization runs on the simpler log-a-flight flow instead.
Step 1 - Book the aircraft
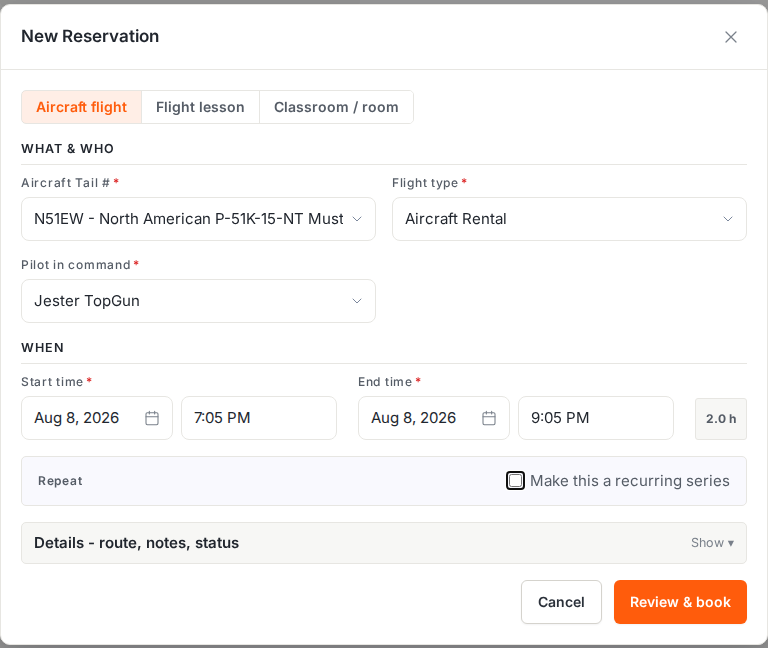
- Open Schedule and click Add reservation (or click an open slot on the timeline).
- On the Aircraft flight tab, pick the aircraft, the flight type, and the pilot in command.
- Set the start and end times, then click Review & book.
The review screen prices the reservation before anything is committed: the hourly rate for the reserved time, tax, and the estimated total. Final charges are computed at return from actual meter readings, so the review screen is an estimate.
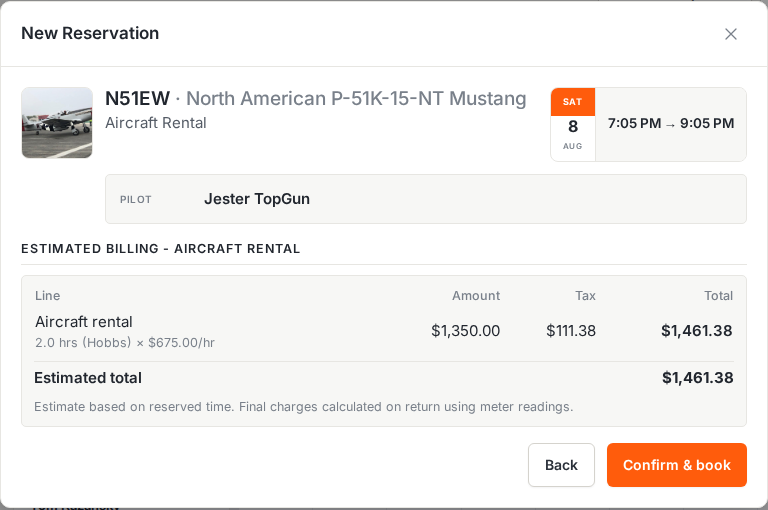
- Check the estimate, then click Confirm & book. The reservation lands on the schedule for the whole organization to see.
Step 2 - Sign the release
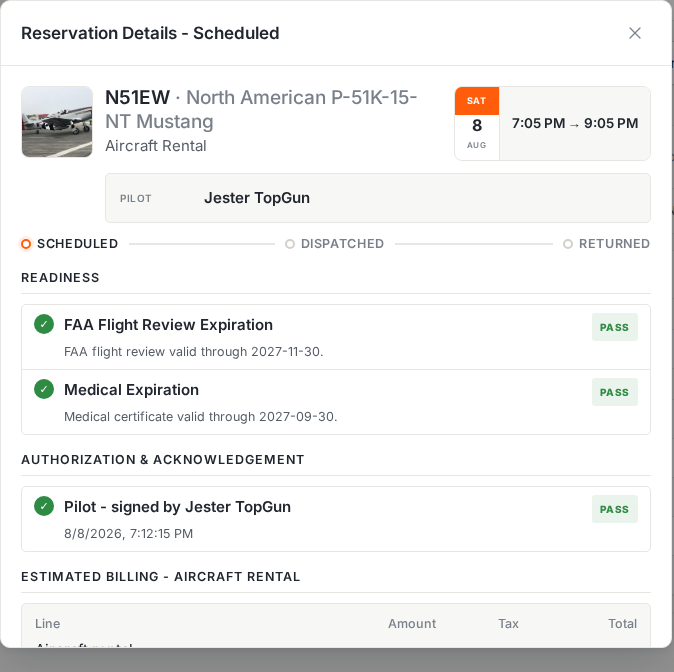
Open the reservation. Resyrv has already run the readiness checks (flight review, medical, and whatever else your organization has switched on) and shows the result per check. Below them sits the authorization section. Until the required signature is collected, dispatch is blocked.
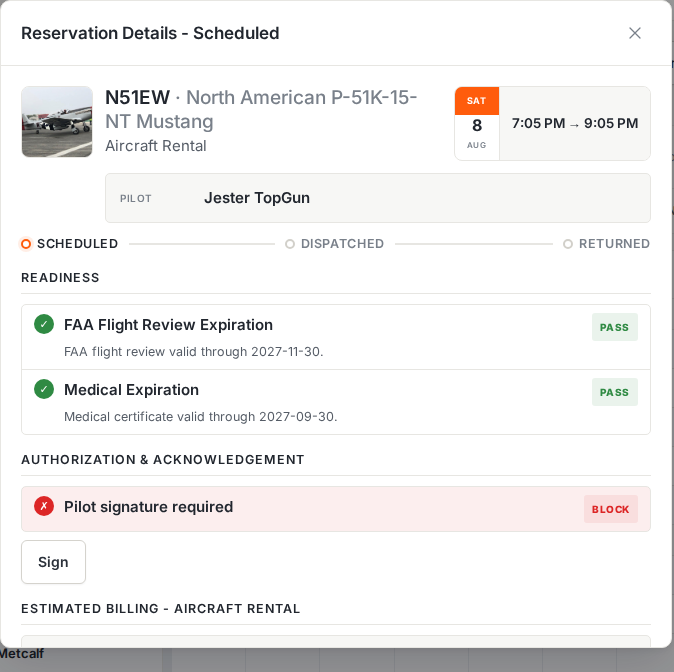
- Click Sign in the authorization section.
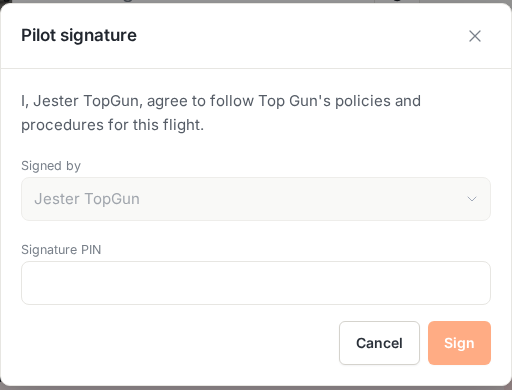
- Enter your signature PIN and click Sign. The PIN belongs to the signer. At a kiosk or front desk, the pilot keys in their own PIN.
Step 3 - Dispatch the aircraft
With the release signed, click Dispatch on the reservation. The pre-flight check re-runs readiness one last time, then asks the pilot to verify the aircraft’s meters before the engine ever starts.
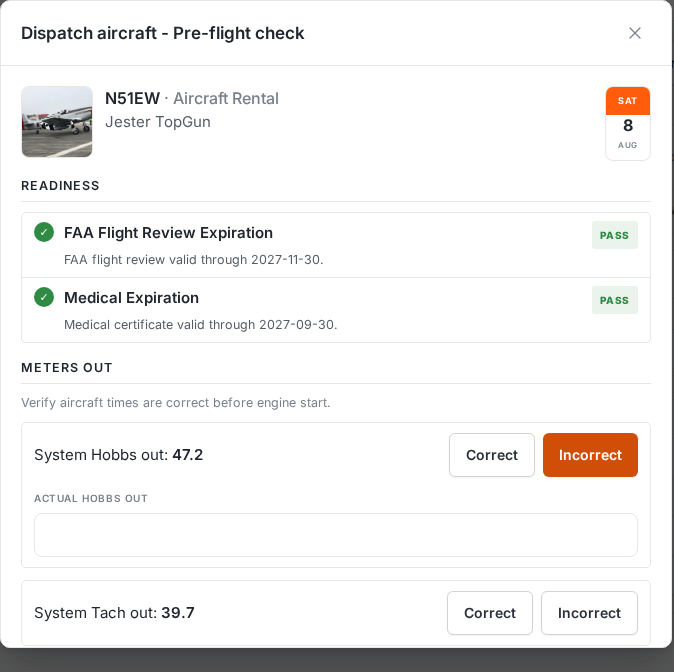
- Confirm the system Hobbs and tach readings with Correct, or click Incorrect and enter the actual reading, which files a meter exception for review.
- Optionally attach a photo of the meters.
- Click Dispatch. The aircraft is now out, and the schedule shows it in flight.
While the flight is out - running late
Resyrv checks every dispatched flight against its scheduled return. A little before the end time, staff get a "due back soon" heads-up if the aircraft hasn’t been checked in; once it’s late past your grace period, the overdue alert fires with the pilot and the expected time, and the Live Flights board shows the aircraft red. Both thresholds are yours to set under Settings then Dispatch then Return Alerts: the heads-up lead, the overdue grace, or turn the heads-up off entirely. Who hears about it, and whether by email or in-app, is set per event on the Notifications page.
Step 4 - Return, review, and settle
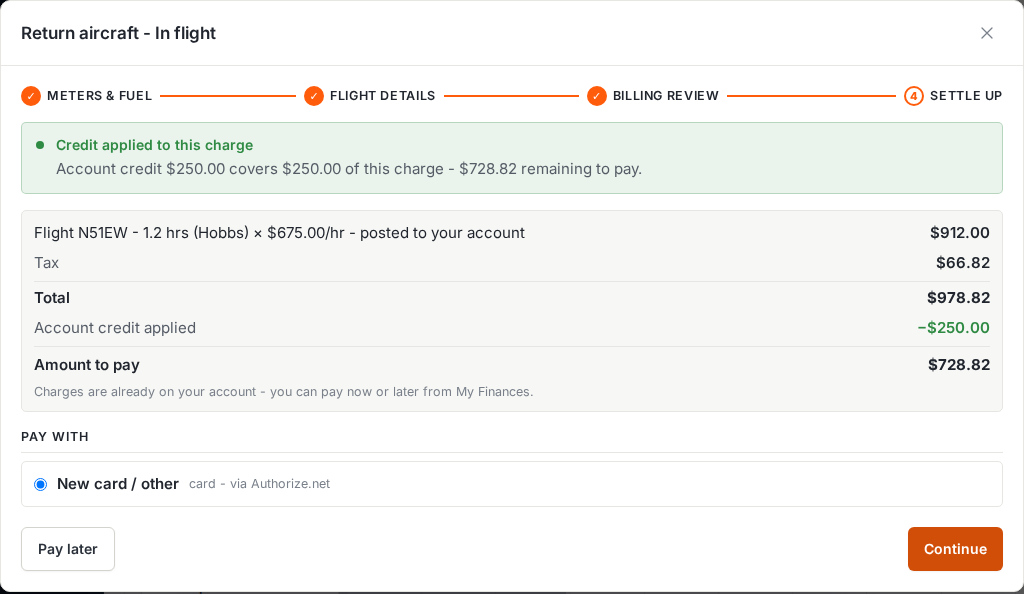
Back on the ramp, open the reservation and click Return aircraft. The return wizard walks four short steps: meters, flight details, billing review, settle up.
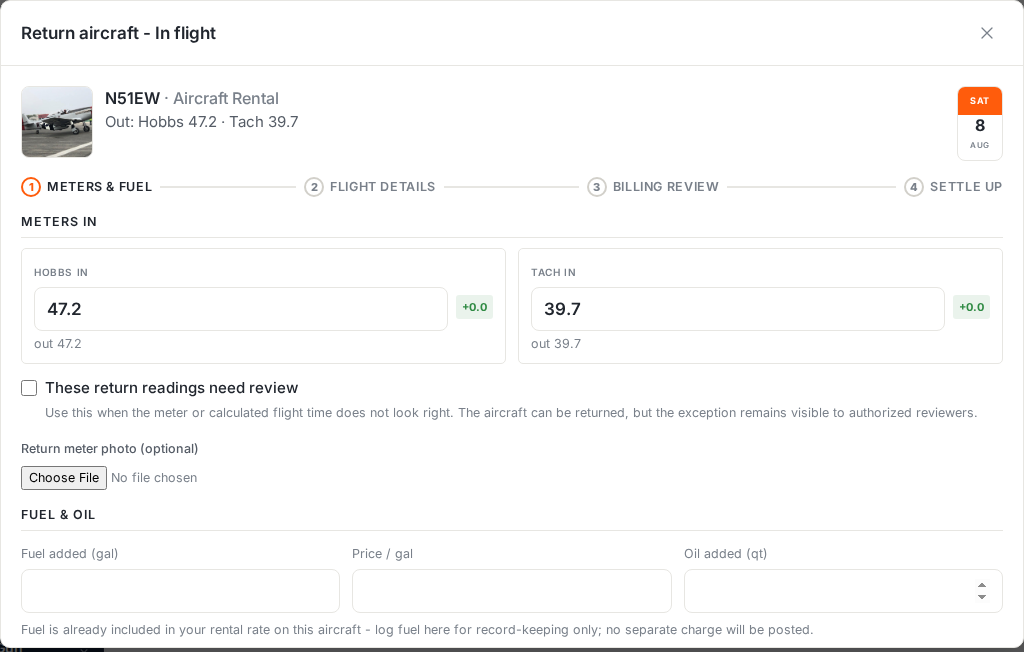
- Enter the ending Hobbs and tach readings. Fuel and oil added can be logged here too. If the metered time runs far past the length of the reservation, the wizard asks for a double-check against a mistyped reading, then lets you continue.
- Add the route and any notes, and report a squawk if something came back broken. It lands straight in maintenance triage.
- Review the billing: Resyrv computes flight time from the meter delta and prices it at the aircraft’s rate. Click Return & post to post the charge.
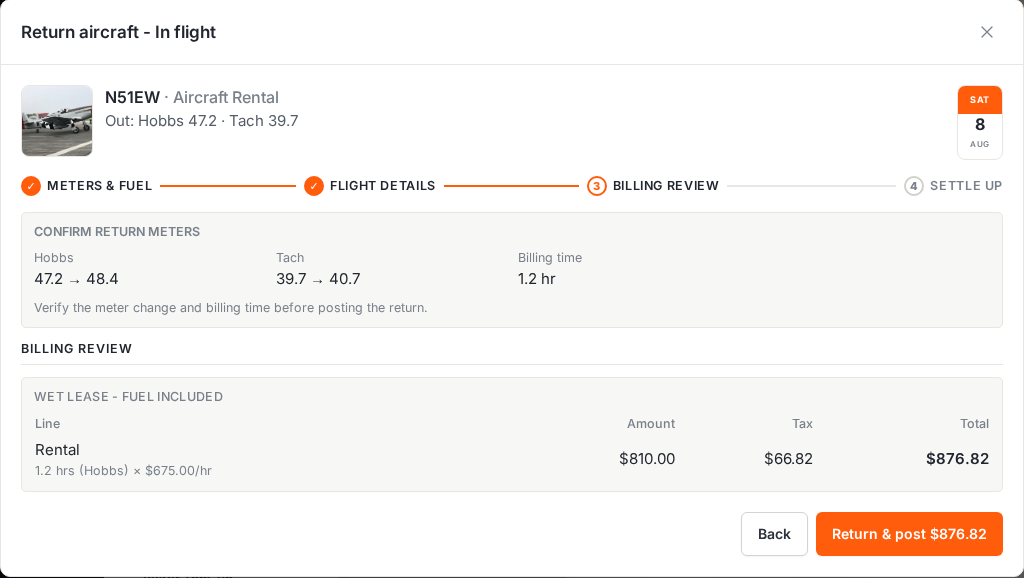
The last step is settle up. The charge is already on the member’s account; they can pay on the spot by card or click Pay later and settle from My Finances. Account credit is applied automatically before anything is charged.
Was this page helpful?
Can’t find what you need? Contact us - a real person reads every message.